This is a really fun and easy craft and the final product is useful too!
What I did first to make this was make a ring using a circle pegboard.
What I did first to make this was make a ring using a circle pegboard.
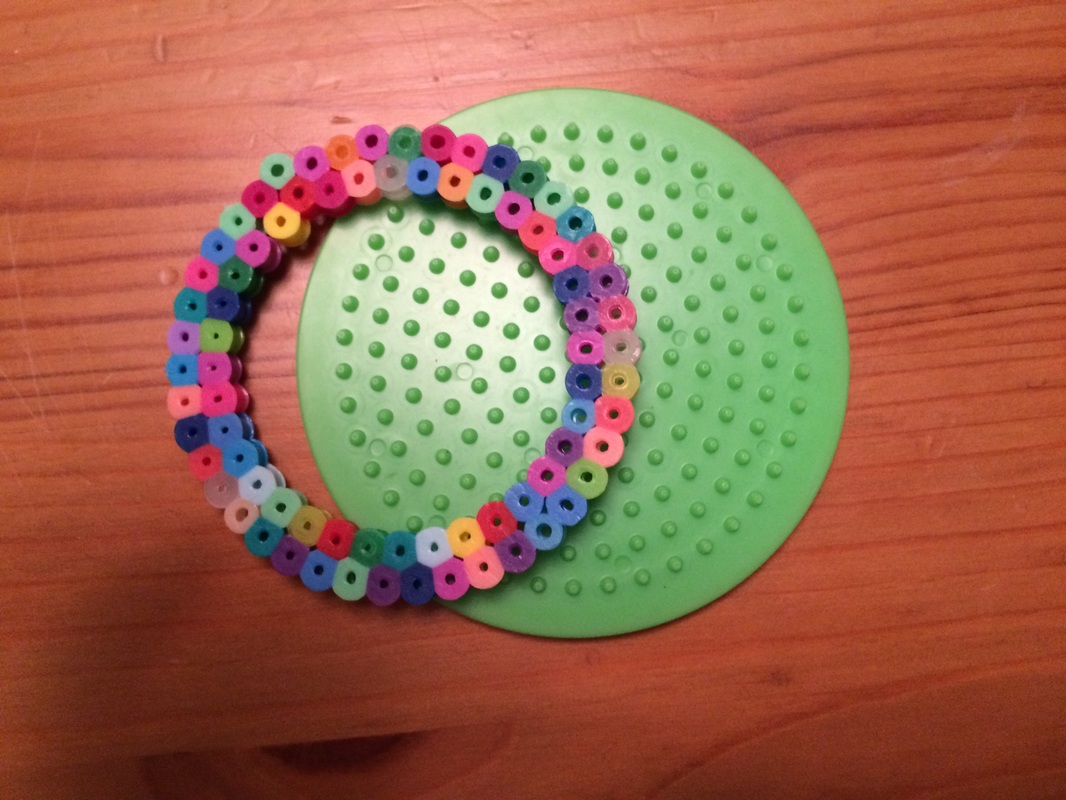

I made the ring two rows thick. Make sure that your ring fits over your doorknob!
I then asked my mother to melt the ring with an iron for about 8 seconds. REMEMBER: ALWAYS ASK A PARENT TO IRON YOUR PERLER BEAD CRAFTS. I decided to do random rainbow colors for my door knob hanger, you can do any colors that you would like.
Next I Started to make the body of the doorknob hanger.
To do this I used a square pegboard the same width of the circle. The rectangle was 14 perler beads wide. At the top you have to make a curve that you will later glue to the circle. To do this make sure you hold the circle above the rectangle so that the curves will fit together. This picture shows how to arrange the perler beads to make the perfect curve that will fit to the circle.
The length of the rectangular part is 17 beads from the highest point to the bottom, you can make yours longer or shorter if you want. In the middle I used black letters to make a C because C is my initial. You can make your initial or skip this step. If you are feeling extra crafty you could try to spell out your whole first name or "Do not Disturb", but this may be tricky. I just stuck to one letter.
Next all you have to do is hot glue the circle to the body of the doorknob hanger (you probably should ask a parent to help with this step)

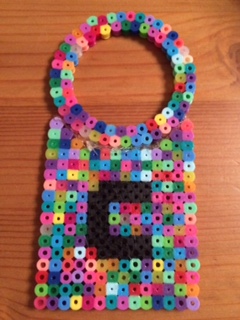

Thats all there is to it! I hope you enjoyed reading about this super fun and easy craft!
Good luck trying this craft out for yourself!
- The Krafty kid
Good luck trying this craft out for yourself!
- The Krafty kid
